You’ve decided to limit your toddler’s screen time. You bought a busy book to keep them busy and help them learn. Now what? How do you assemble it? Don’t worry, I’ve got you. Think of this blog post as your step-by-step guide to downloading, printing, and assembling your busy book.
Table of Contents
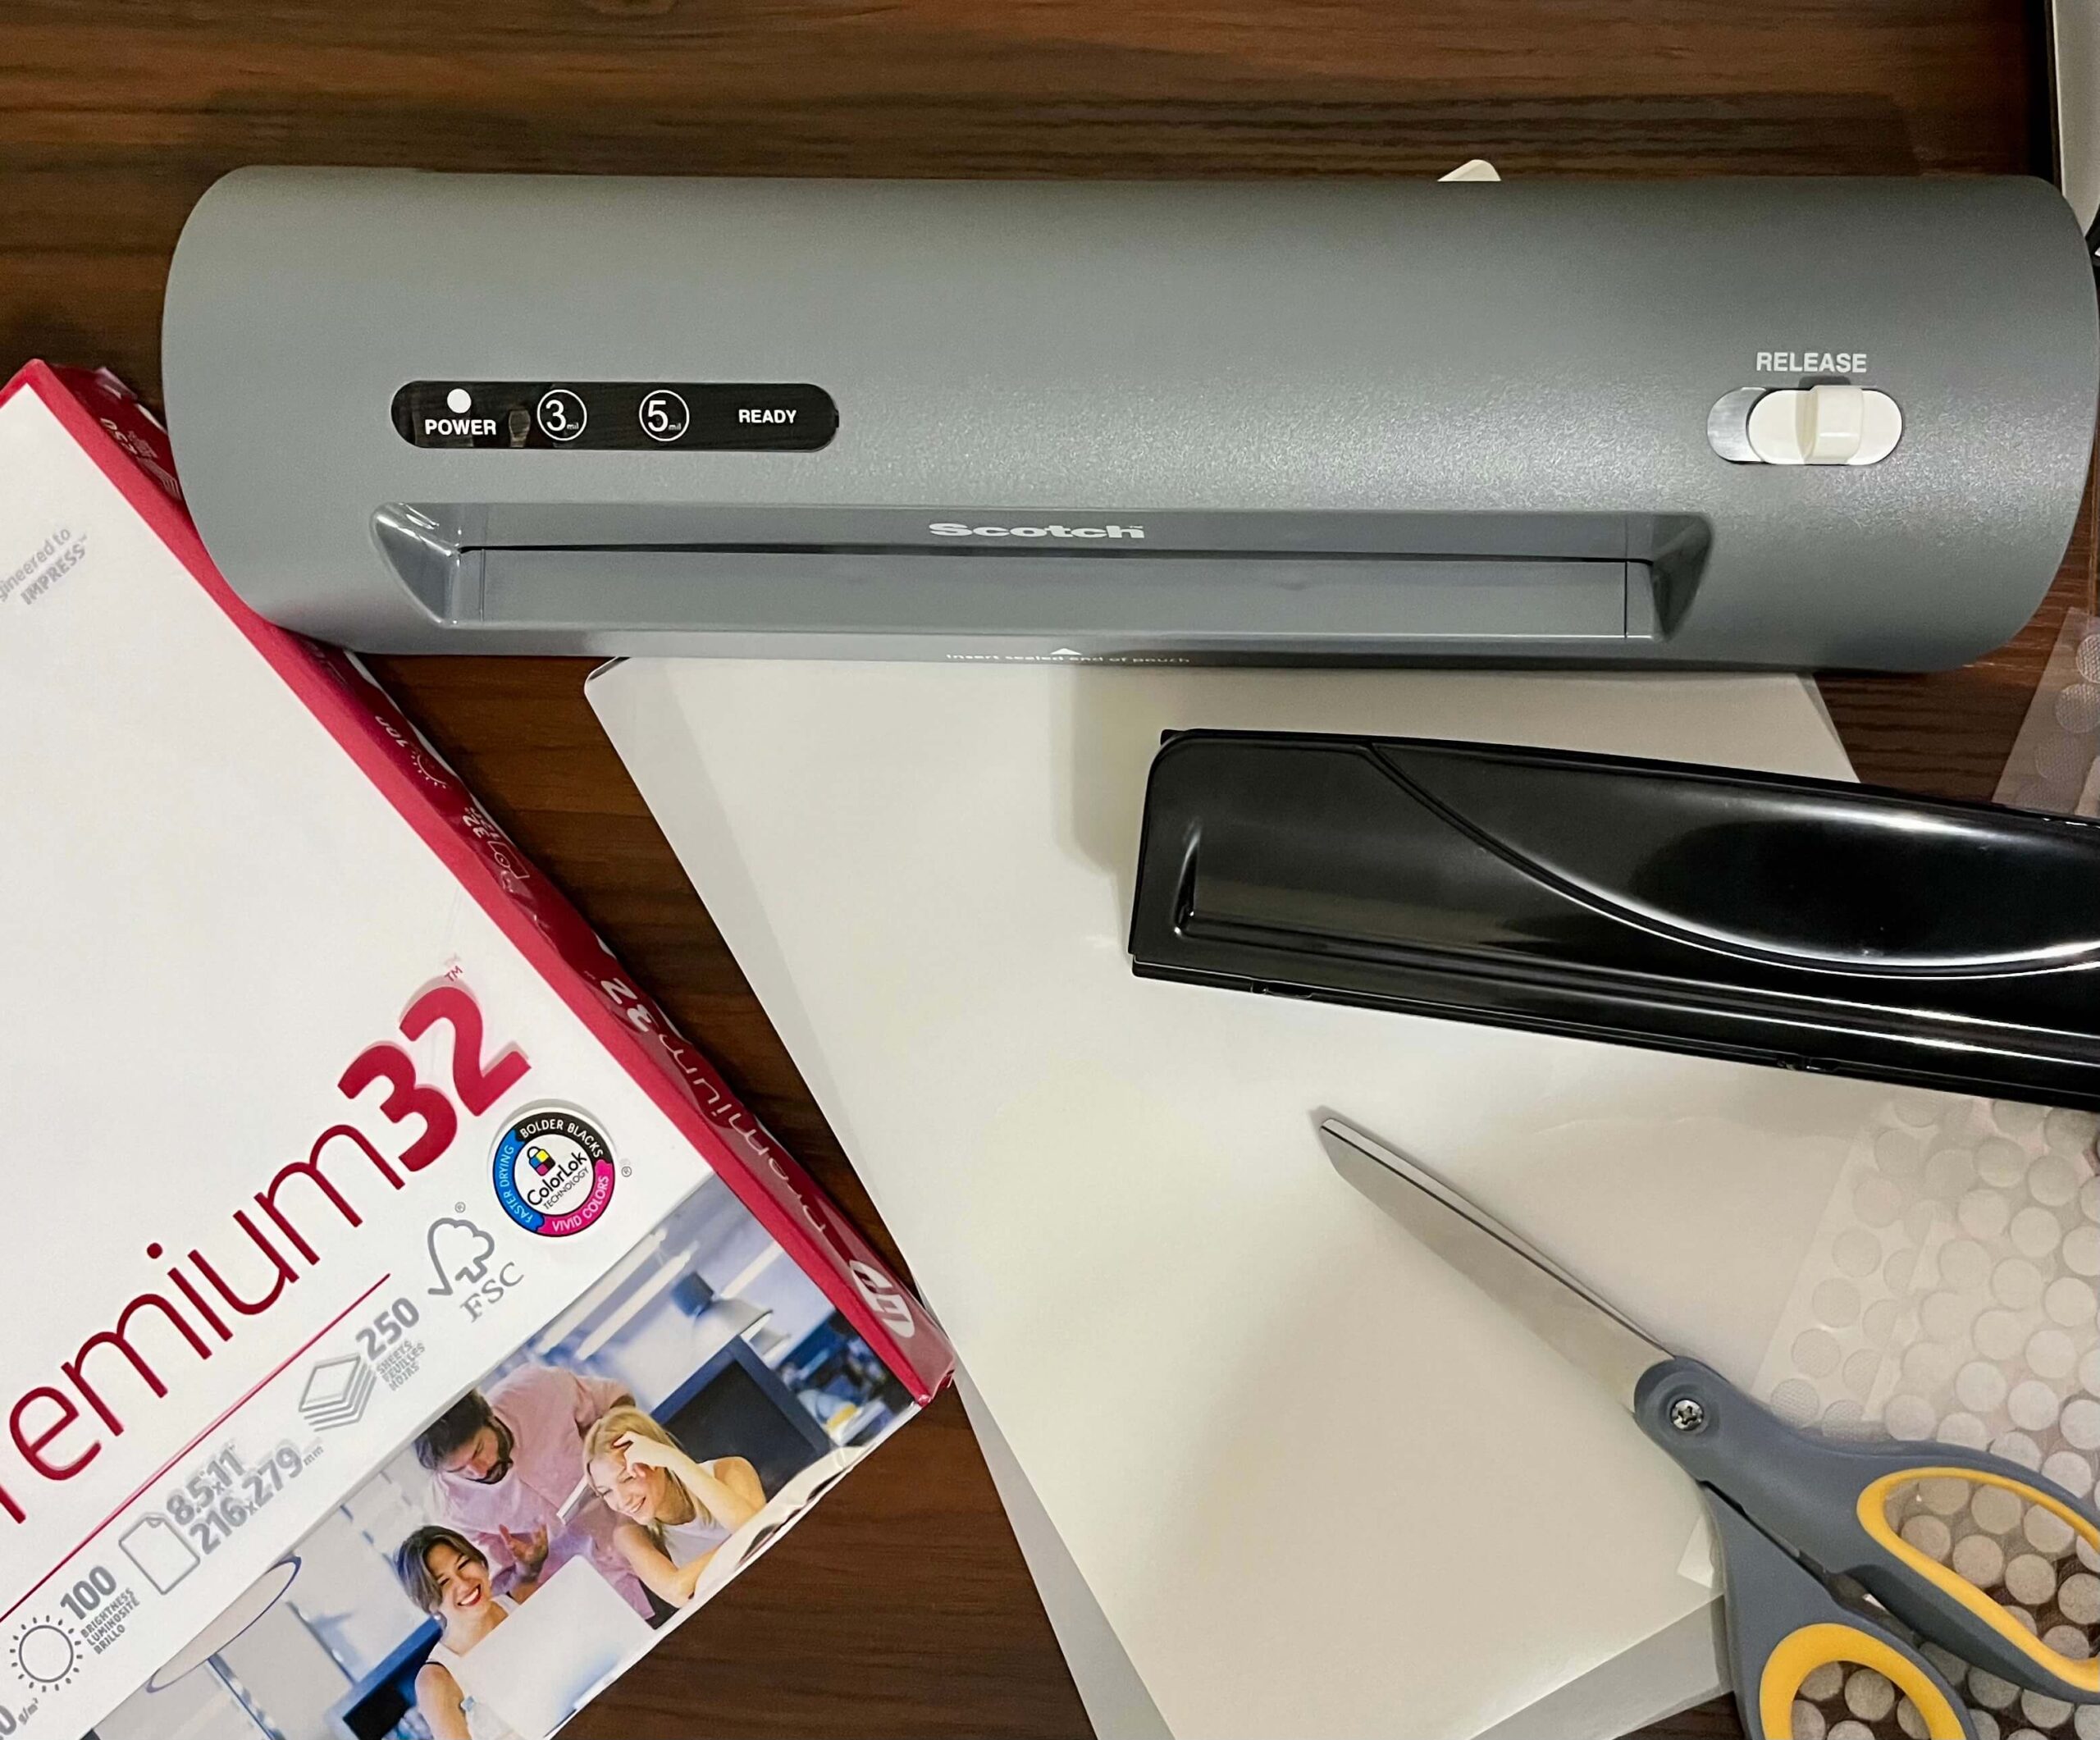
STEP 1: ENSURE YOU HAVE THE SUPPLIES NEEDED
This post may contain affiliate links. Meaning I receive commissions for purchases made through those links, at no cost to you. Please read my disclosure here for more info.
Below I have listed the supplies you will need in order to assemble it. (All links are products that I use in the assembly of my busy books.):
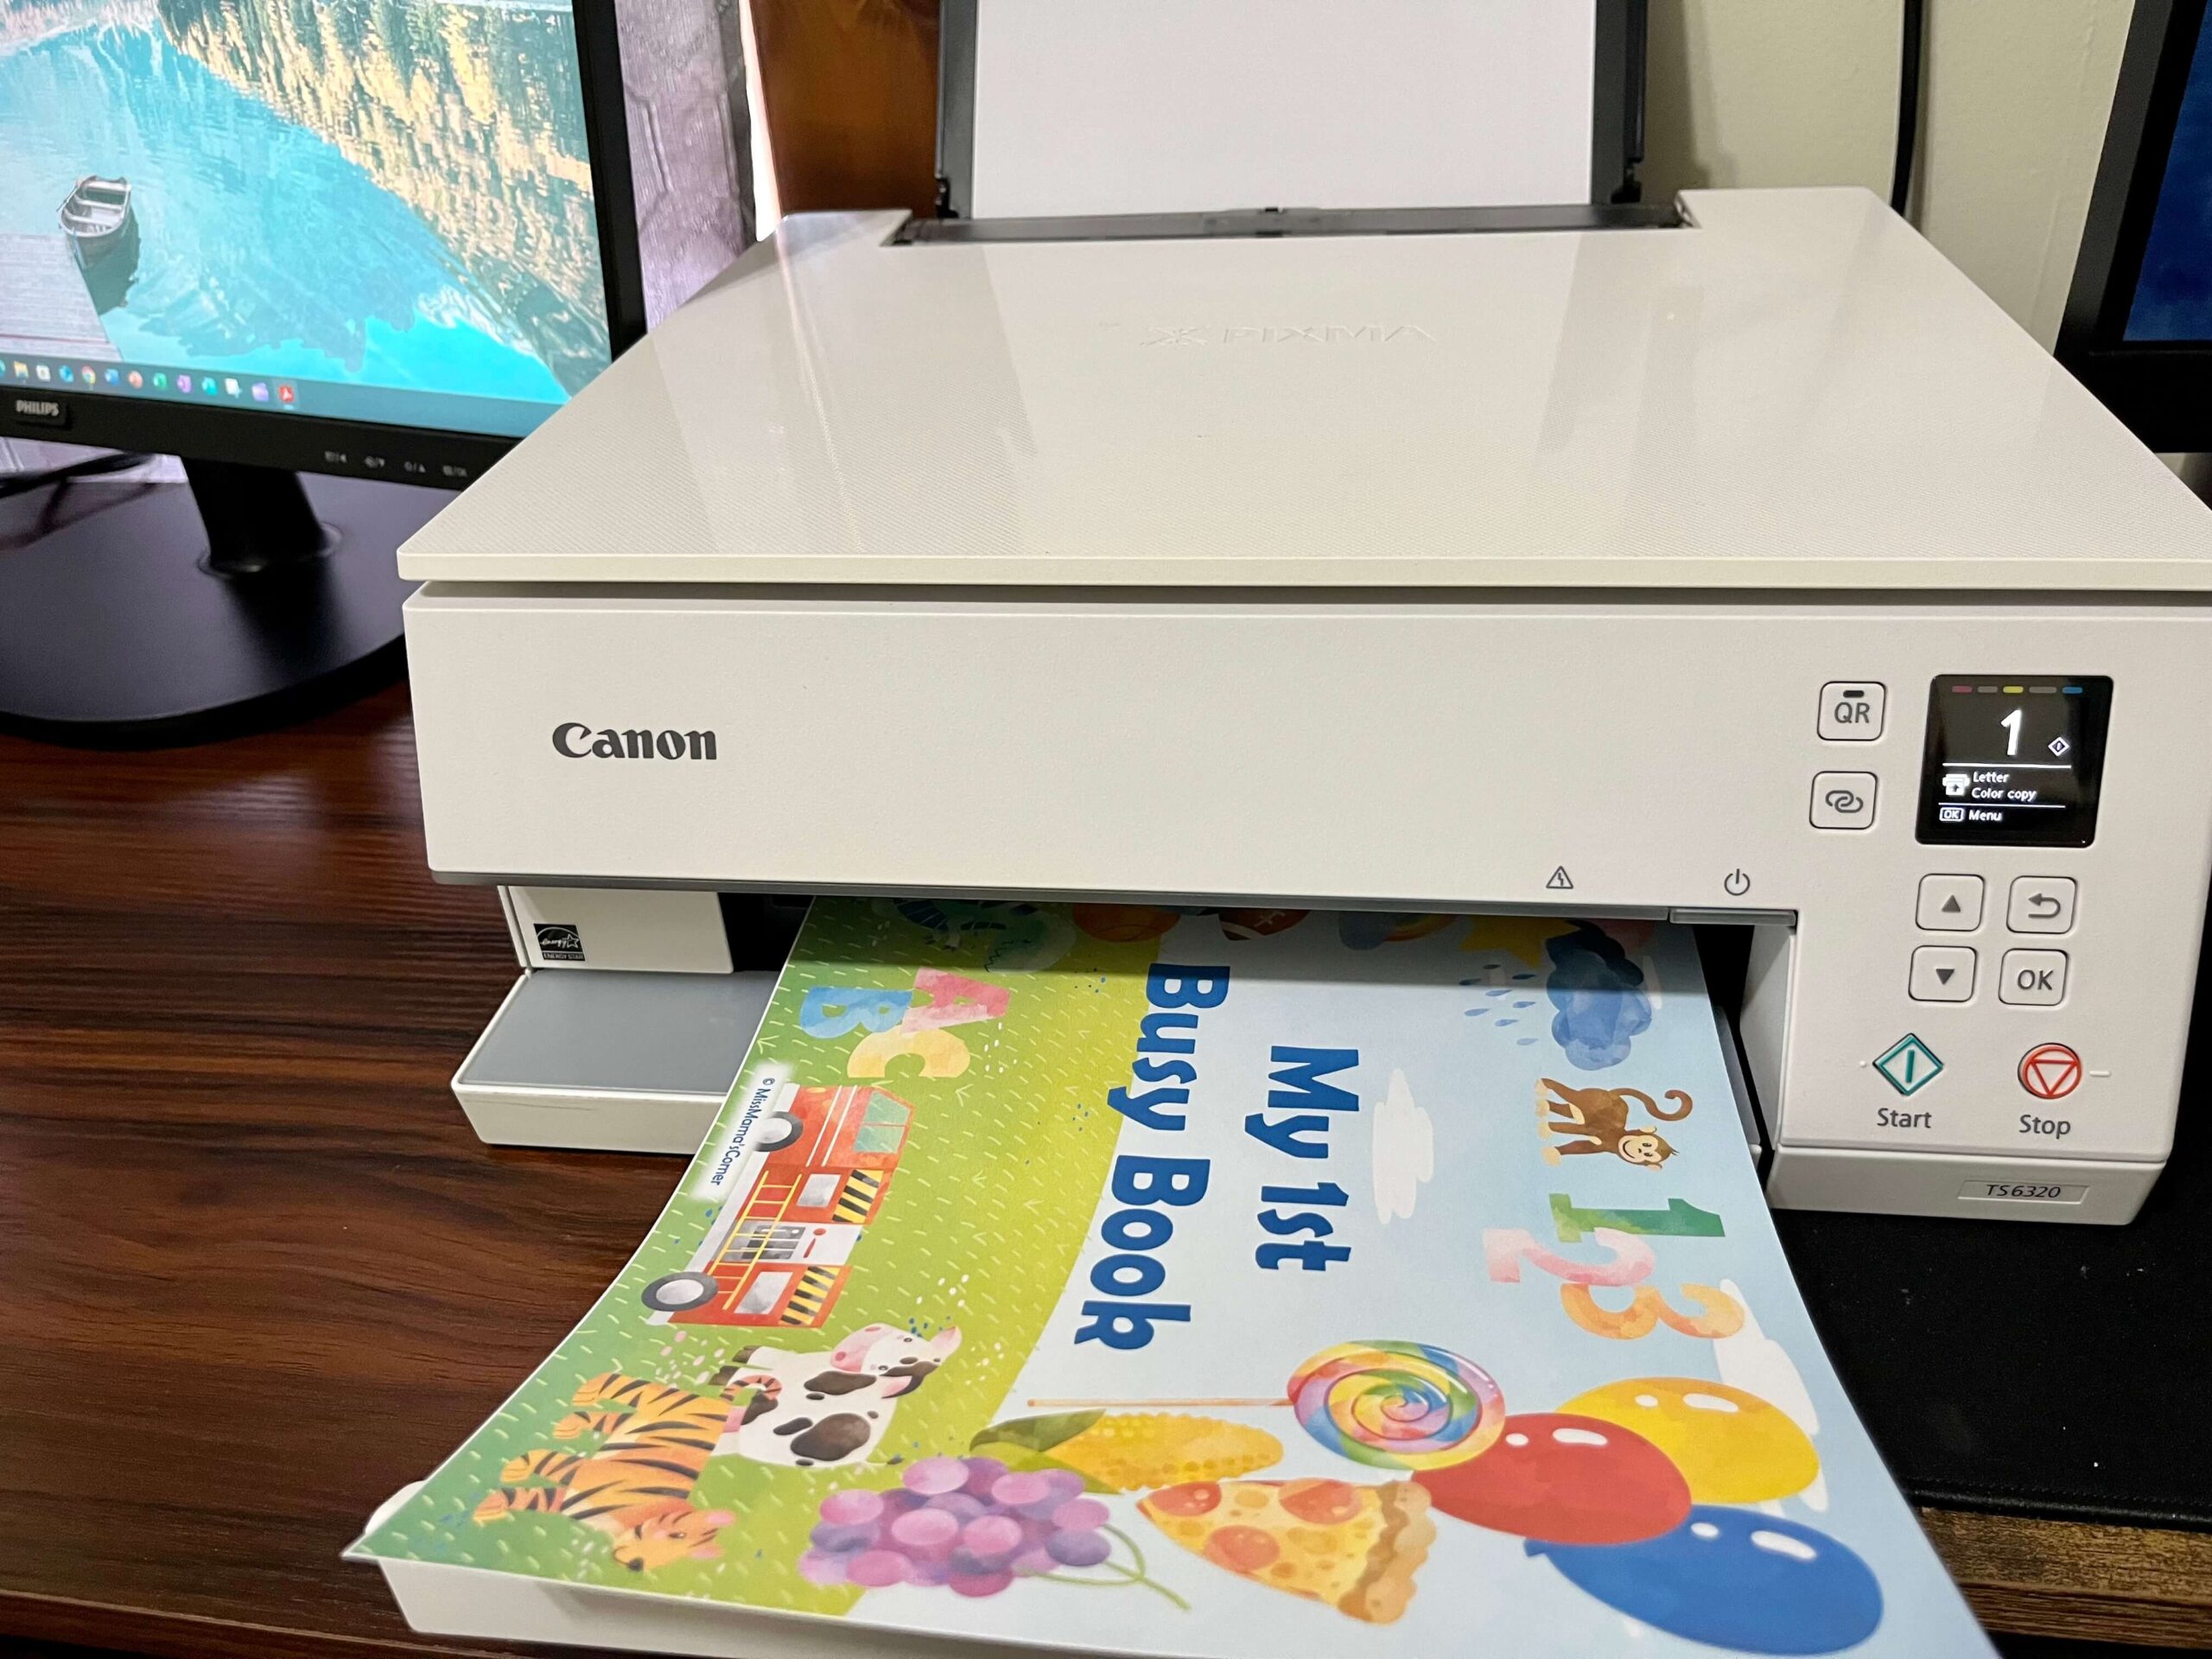
- Color printer
- White Heavyweight Paper (Recommended: Premium 32lb | 100 bright)
- Laminator
- Laminating Pouches (3mil works very well)
- Hook and Loop Dots (1.5cm/0.59in) with transparent back (**The transparent back is very important so you can see the printed detail on the activity pages and match the cutouts to them.**)
- Scissors
- Dry erase markers for the tracing pages
- Optional: hole punch, ring binder or binder rings, corner cutter, paper cutter, hook and loop strips.
STEP 2: DOWNLOAD YOUR FILES
This will vary depending on which platform you purchased your busy book from. I have two stores, one on Etsy and the other on Teachers Pay Teachers, also known as TPT.
If you purchased your busy book on Etsy while logged into your Etsy account, then follow the steps below:
- Click on “Your Account” at the top right-hand side of the page. (It will be the person icon or your picture)
- Click on “Purchases”
- Scroll down, you will see all your purchases.
- To the right of your purchase you should see a button that says, “Download files”, click on it.
- This will take you to a new page. Scroll down until you see the “Download” button.
- Click the “Download” button. It should automatically download to your “Downloads” folder on your desktop.
If you checked out as a guest on Etsy, please check your email.
You should have received an email receipt. In that email there should be a link to download the files. If you are still having troubles finding it, send me a message through Etsy so we can discuss a way to send you the files.
If you purchased your busy book on TPT, follow the steps below:
- Log in to your TPT account.
- Click on your account profile icon (usually at the top, right-hand side of the page), and choose “My Purchases” from the dropdown menu.
- Find the Busy Book that you purchased and click the “Download” button.
- If the busy book you purchased is linked to a Google Drive account, click the “Add to Google Drive” button. You will be prompted to sign in to your Google Drive account.
- Click on the files that you would like to download and hit the “Download” button.
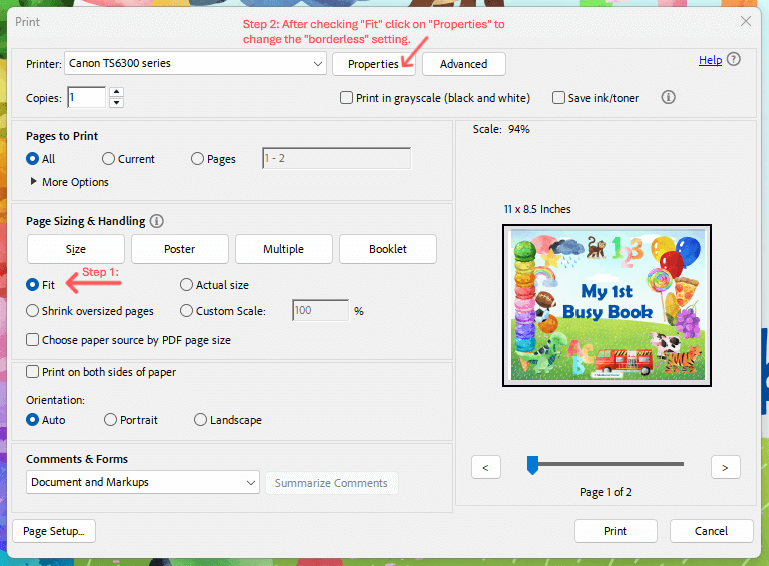
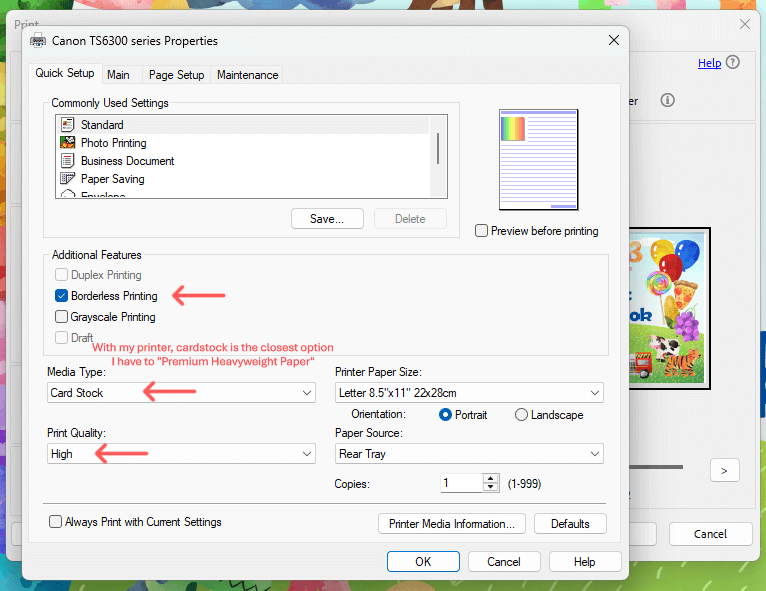
STEP 3: PRINT YOUR PAGES
IMPORTANT: Don’t try to print the files from your Google Drive. Make sure you have downloaded the files to your computer.
- Open the downloaded file(s). They should be saved in your “Downloads” folder on your desktop.
- Print your selected PDF files using a color printer
- Make sure your printer setting is set to “fit page” or “scale to fit” to avoid cutting off any content
- For no white margin, be sure to choose “borderless” in your print settings.
STEP 4: LAMINATE YOUR PAGES
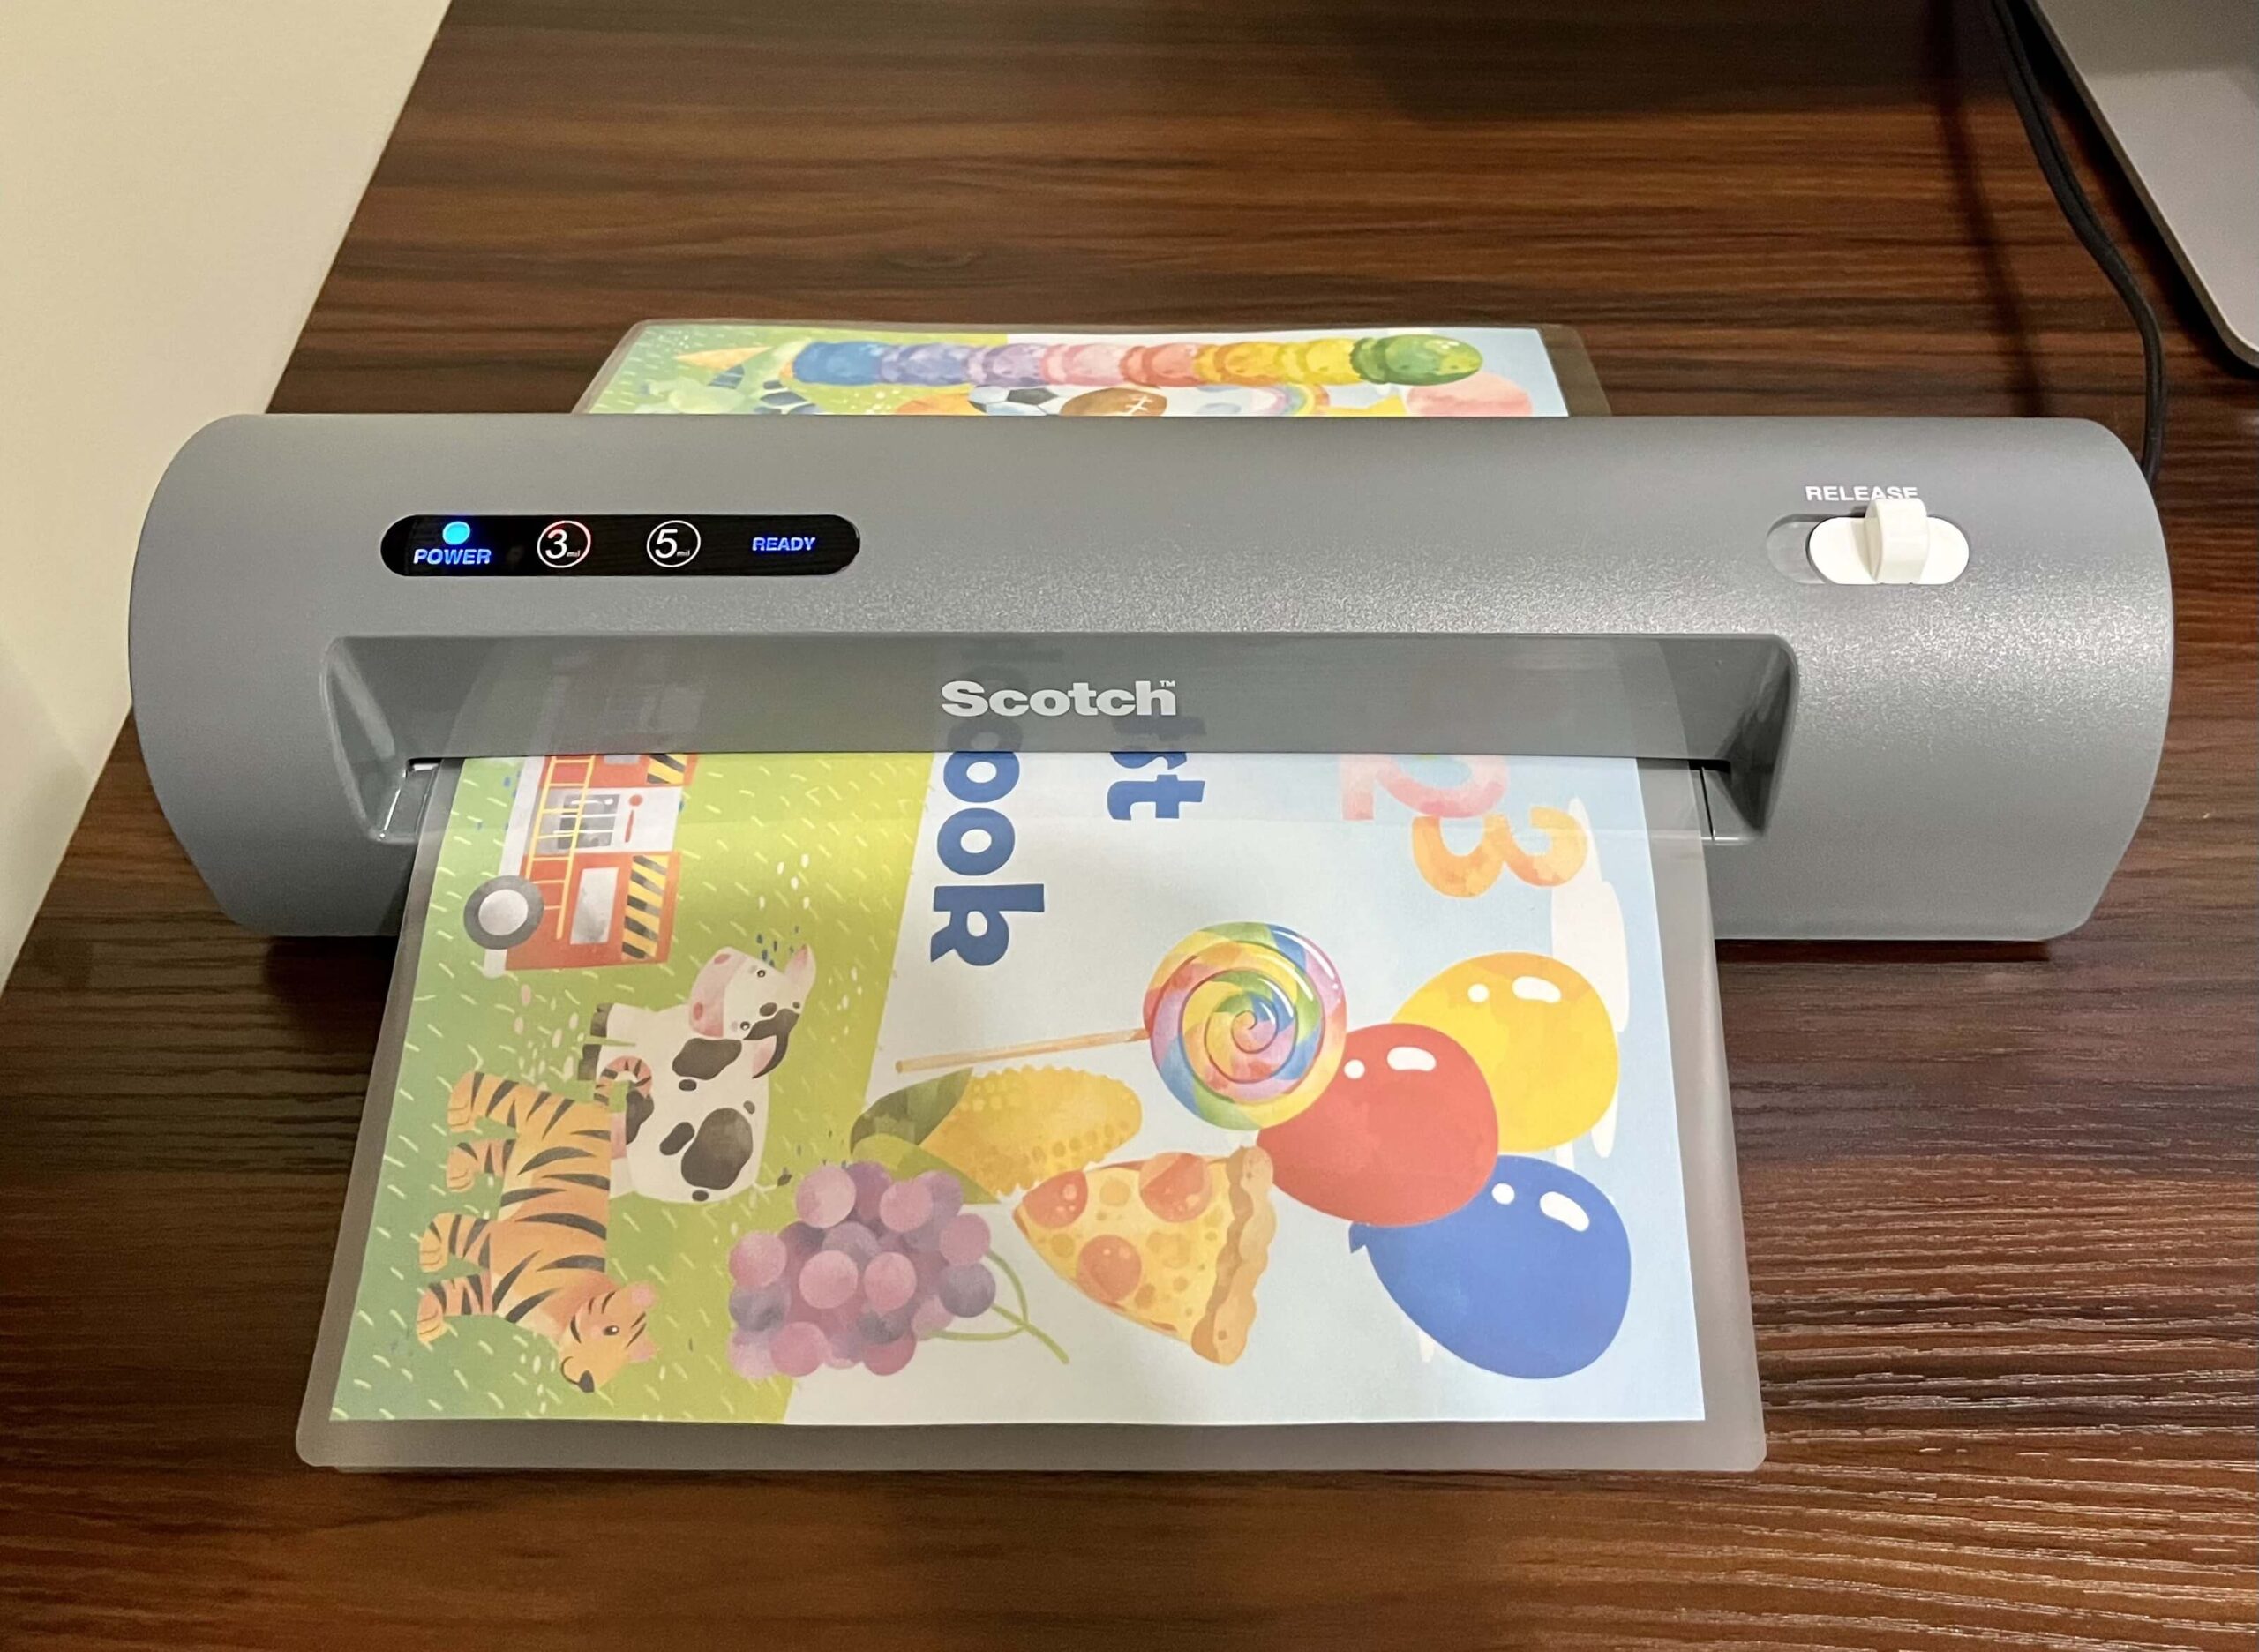
Although not mandatory, this step is highly recommended. Laminating your pages and cut-outs will protect them from tearing, spills, and allow you to use it for much longer.
- Insert printed pages into laminating pouches.
- I use 3ml laminating pouches, and they work great.
- Run them through a laminator (This is the laminator I use. It works very well, is compact, and affordable.)
Pro Tip: When positioning your activity pages into the laminating pouches, leave extra room at the top of the page to allow for the holes you will need to make if assembling it with binder rings or in a three ring binder.
Optional alternatives:
- Use adhesive laminating pouches that don’t need heat or a laminator. With this method, make sure to cut out your cut outs before laminating them.
- Print on cardstock and use without laminating.
***If choosing to use one of the alternative methods to laminating your pages, just remember that they won’t be as durable, and you will likely need to print them multiple times as the pages could become damaged.***
STEP 5: CUT
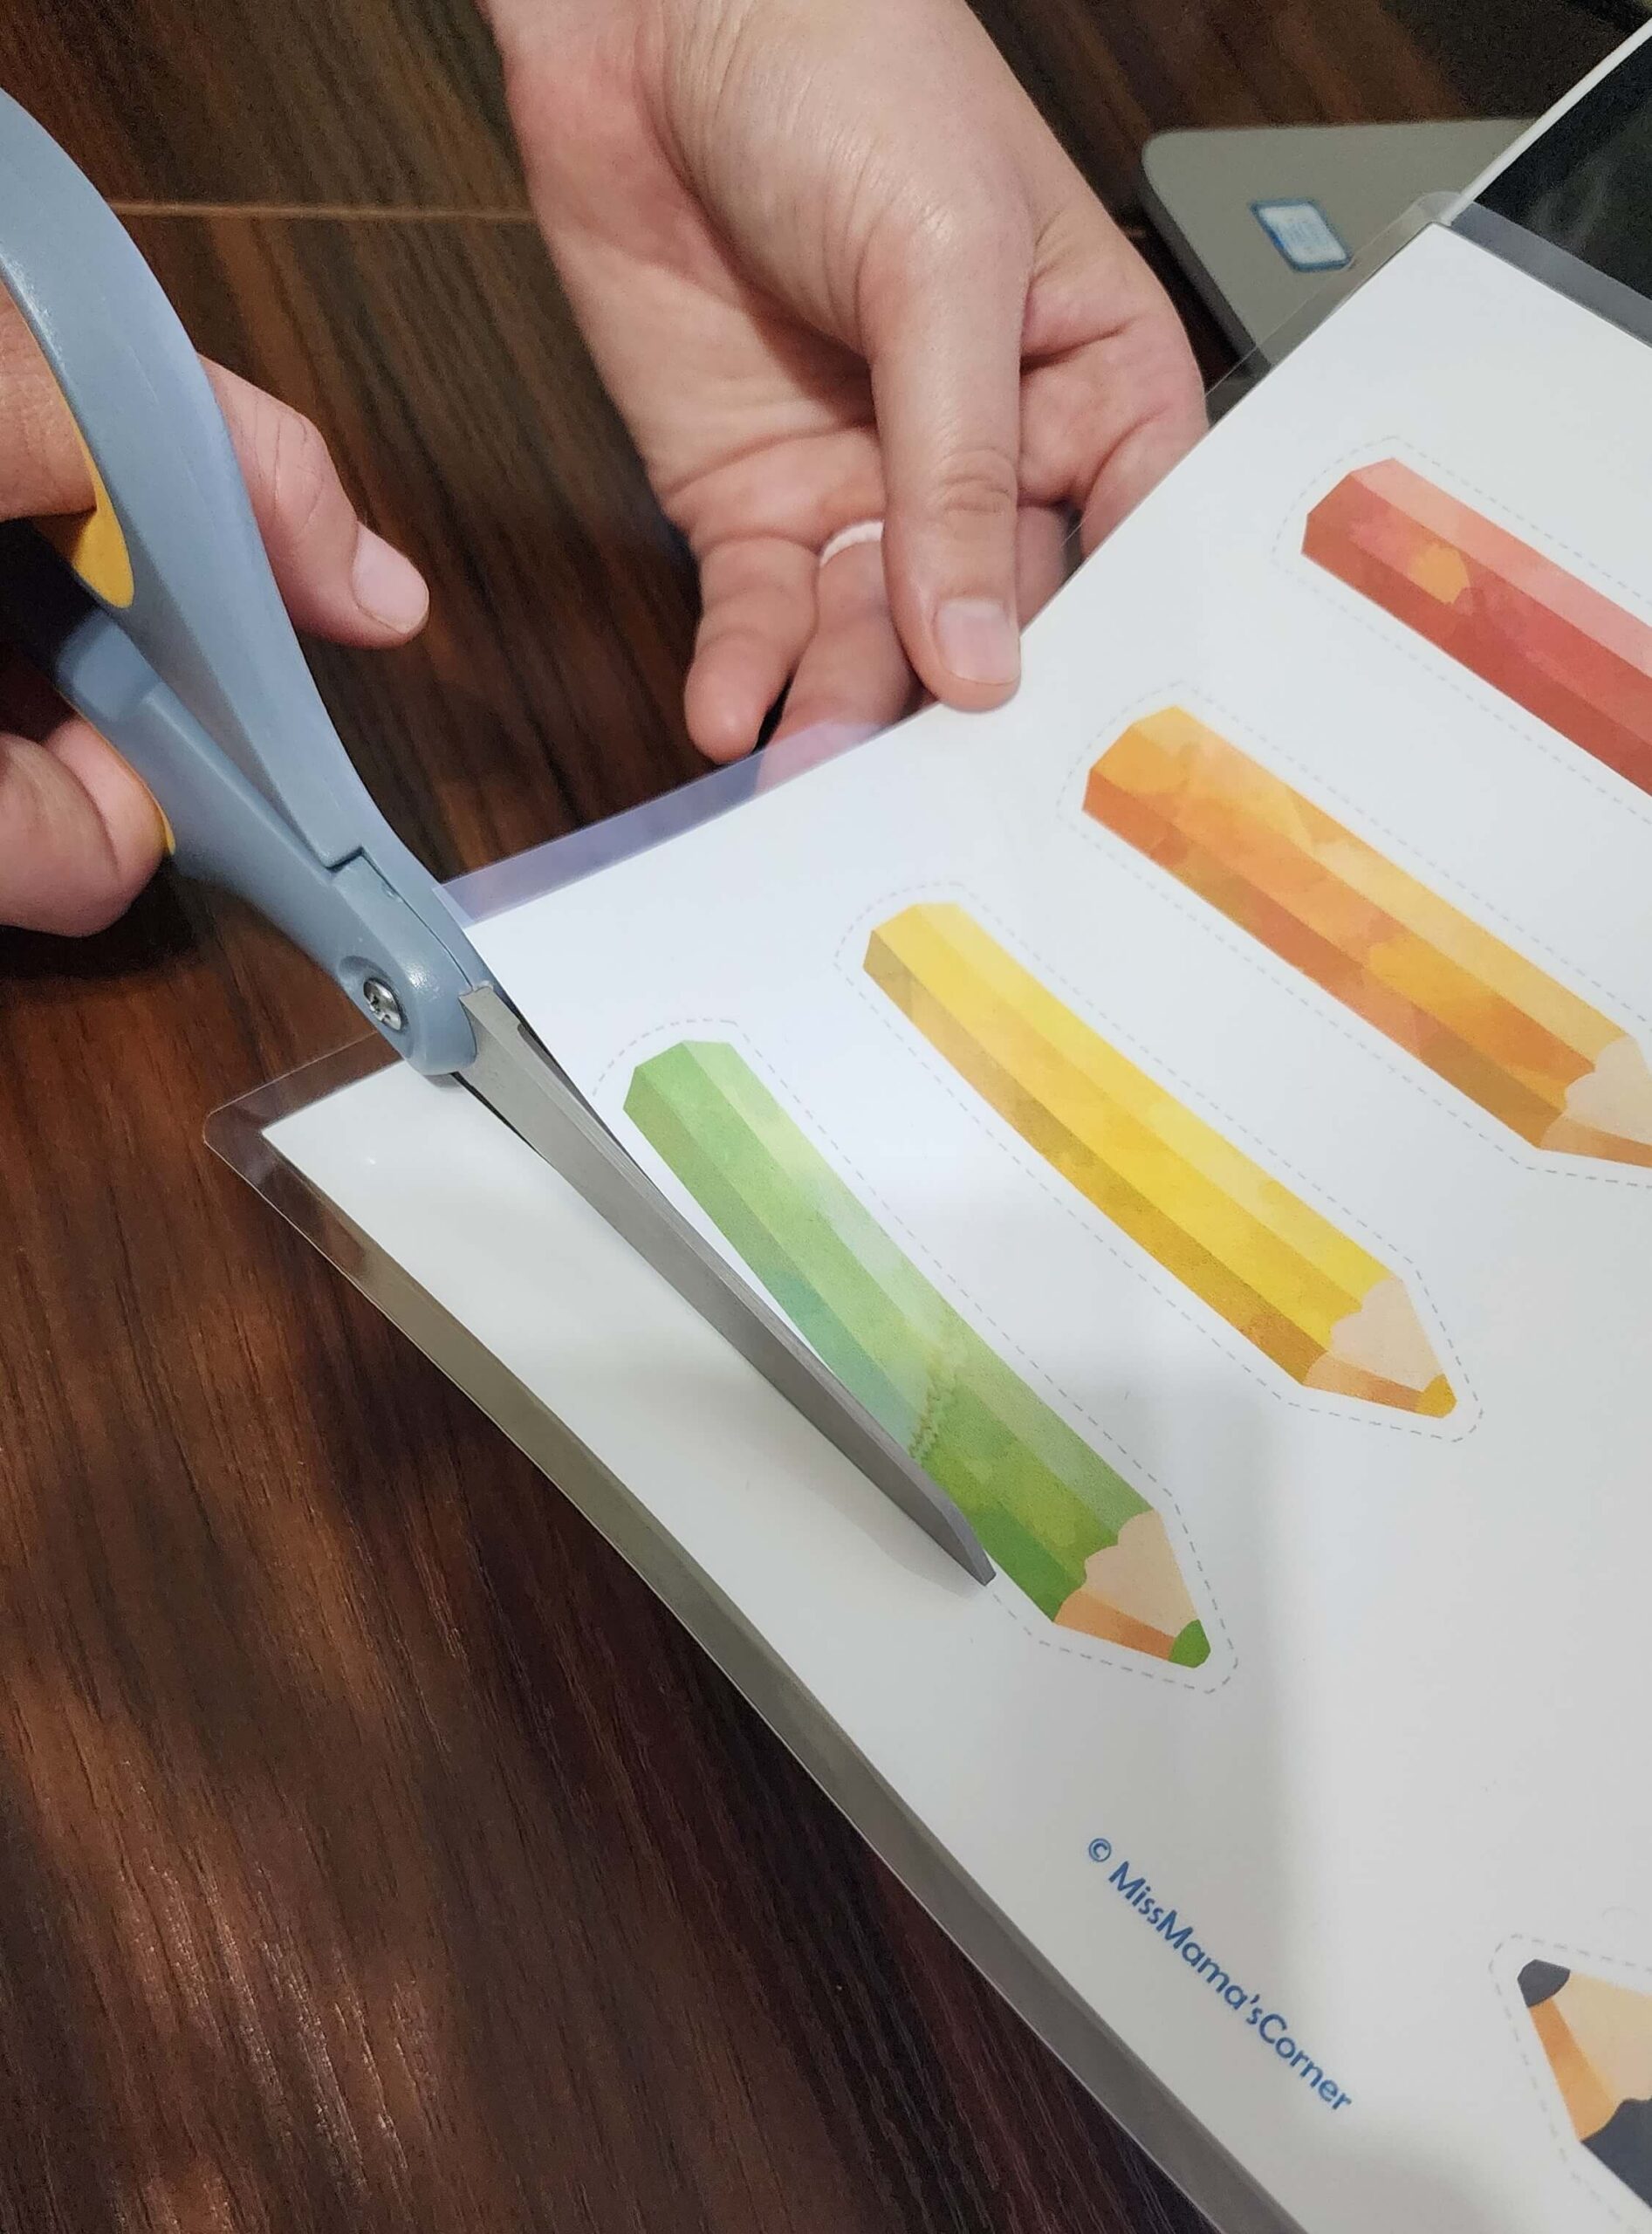
- Carefully cut along dashed lines or colored edges using a scissors.
- Make sure to round off all corners so there are no sharp edges for young children. A corner cutter may be used.
DISCLAIMER: Adult supervision required. Make sure all edges and corners are not sharp. The finished product may contain small parts.
STEP 6: ATTACH HOOK & LOOP DOTS
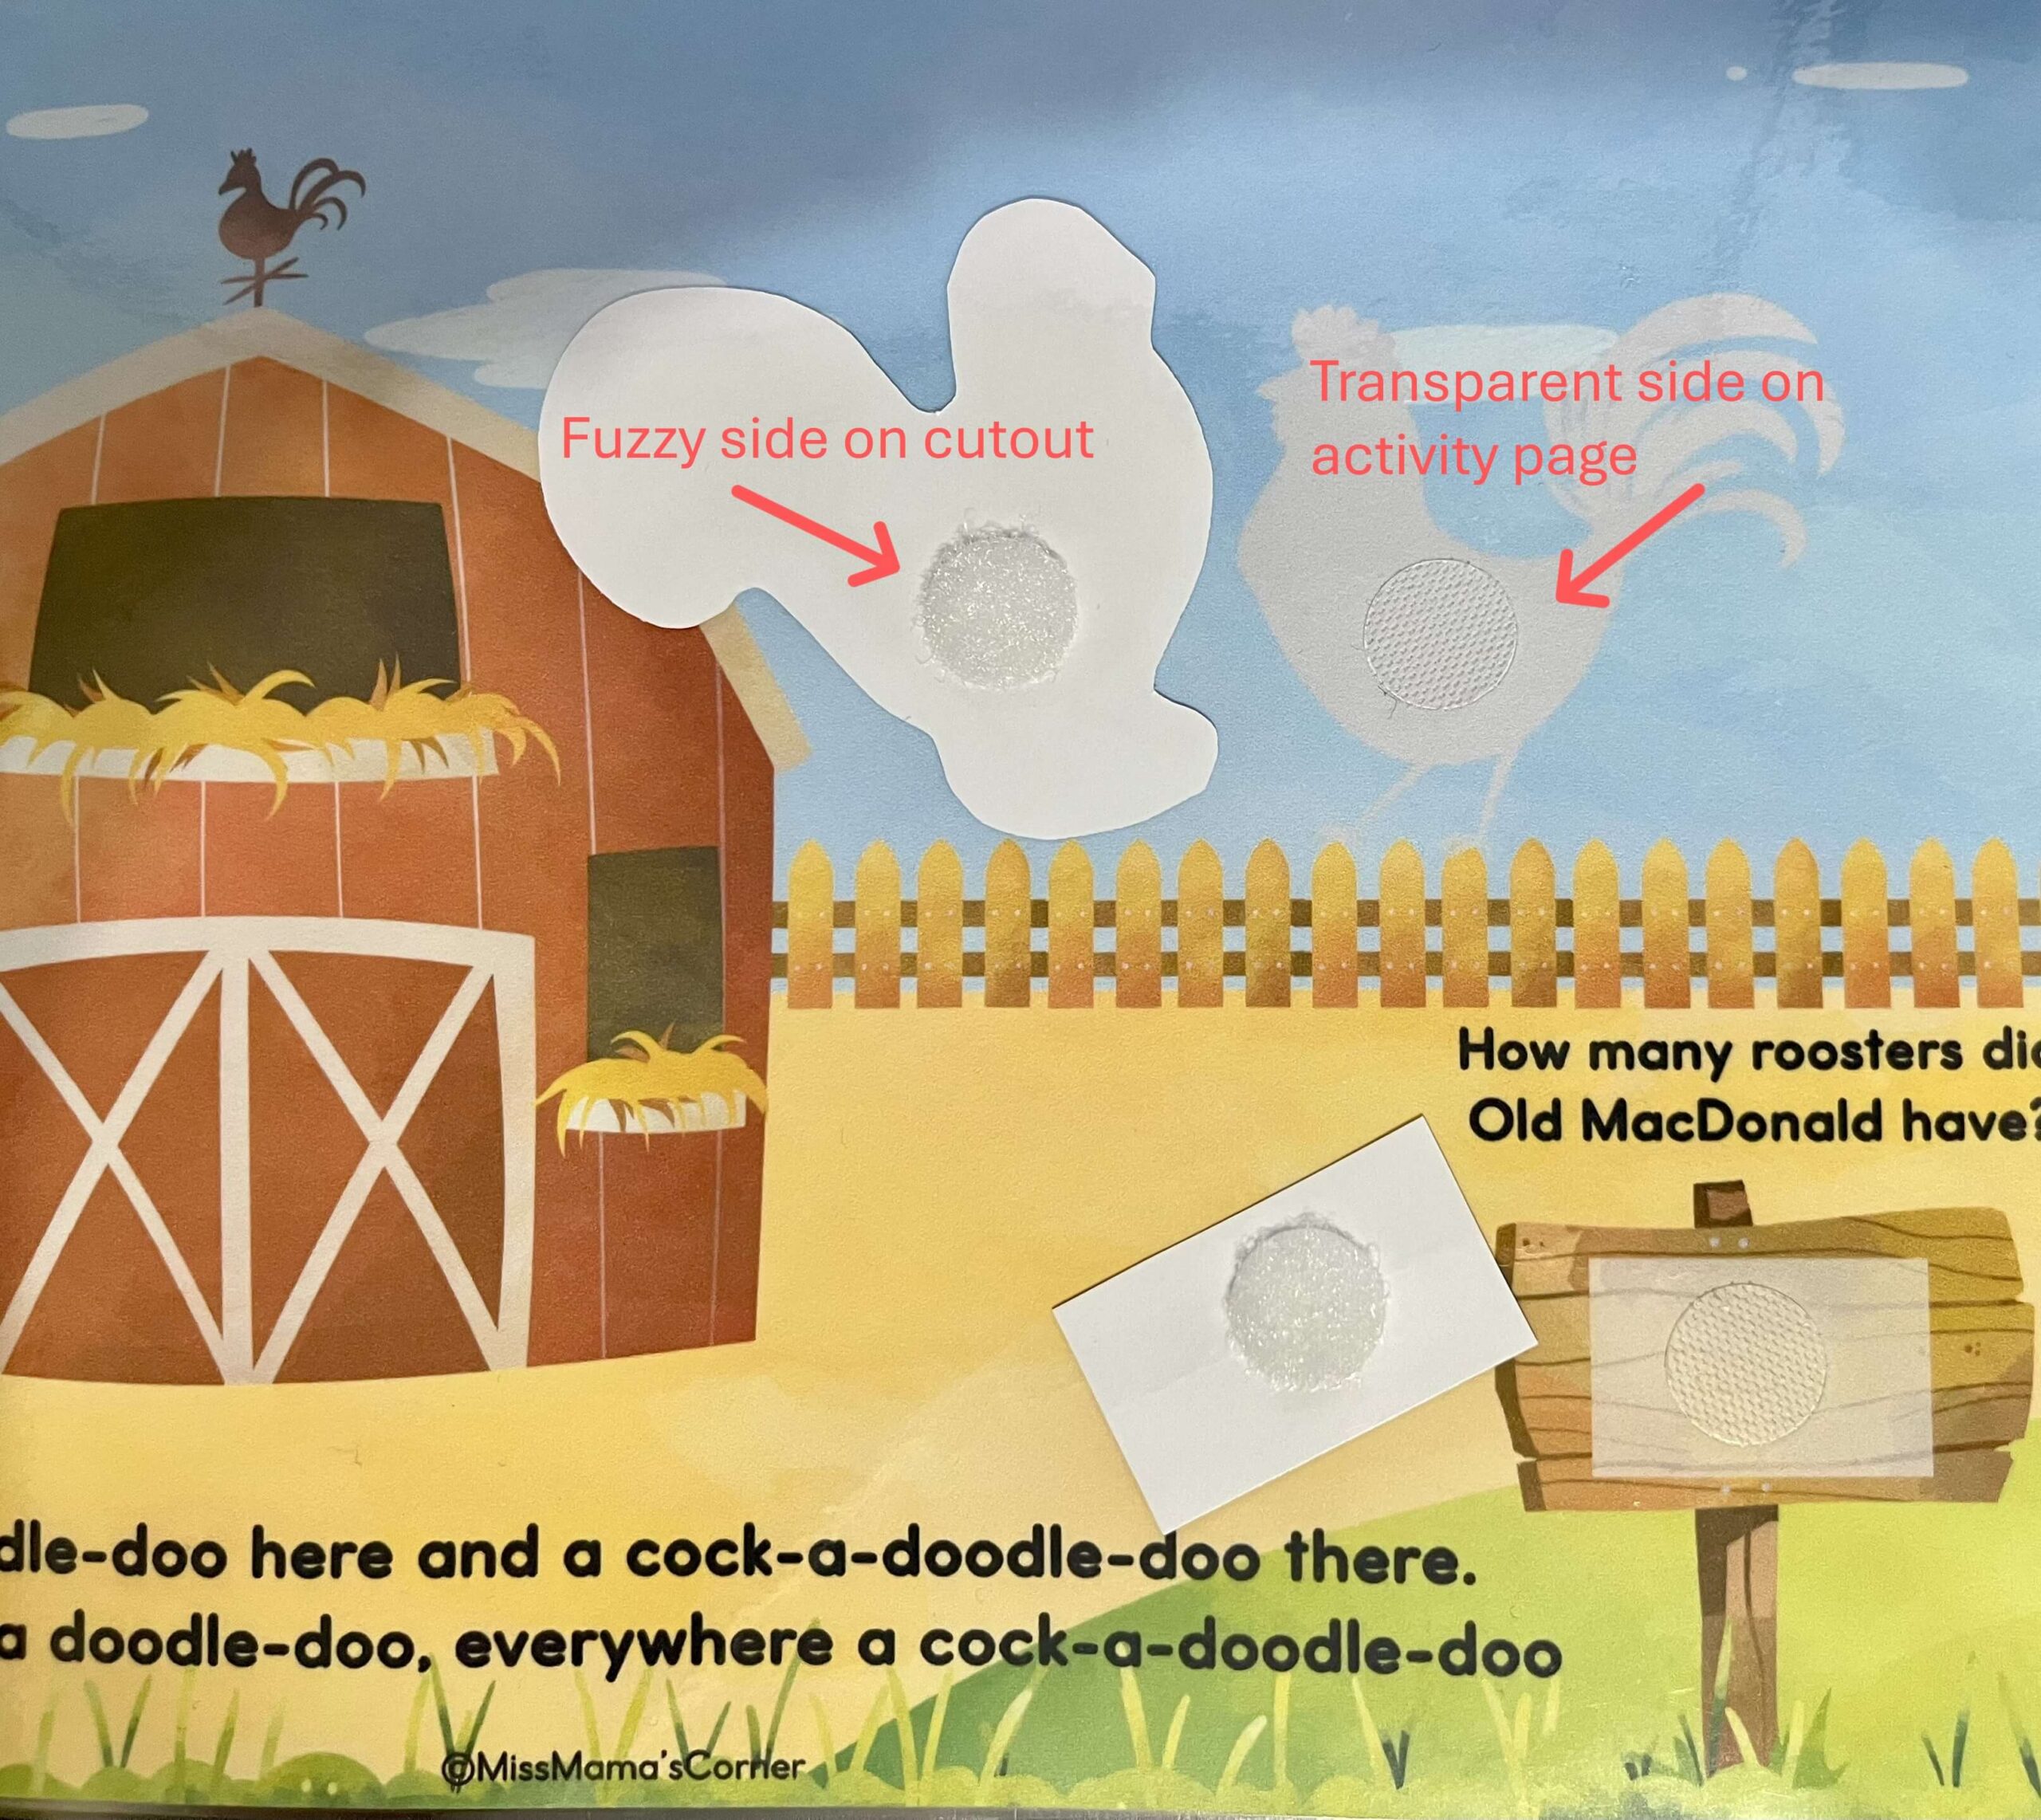
- Attach the transparent back of the hook and loop dots to the activity pages
- Attach the “fuzzy” side of the hook and loop dots to the cutouts.
STEP 7: OPTIONAL
The pages may be assembled using binder rings or assembled into a ring binder.
STEP 8: HAVE FUN LEARNING
Enjoy learning with your little one!
I hope this tutorial was helpful for you in assembling your busy book. Please reach out to me through my Etsy page, TPT page, or by commenting on this post with any questions you may have.
Thank you for trusting Miss Mama’s Corner to help you teach little hearts and minds!